


Build Your Own Golf Cage
What you will need...
- Hex key supplied
- Spirit Level
- Step Ladders
Product Summary
Practice like a professional with this premium quality golf cage. Perfect for the back garden, this 3.1m x 3.1m x 3.1m golfing cage delivers ultimate performance in every location. This freestanding golfing cage has a frame manufactured from galvanised steel.
The Cage frame is built from galvanised steel tubing and clamps for additional durability.
Whether you are practicing your short game or working on your driving, this golf cage will help you excel for all your training needs and requirements.
The thicker 42.4mm galvanised steel frame provides additional durability and extra strength during any session.
Important: These cages are for the frame only and do not include the nets.

Parts
Step by Step Guide

Step 1
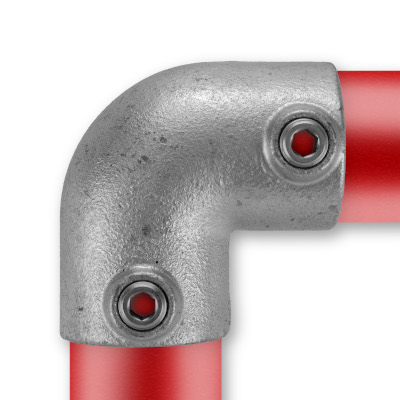
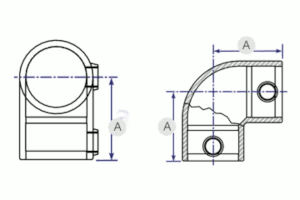
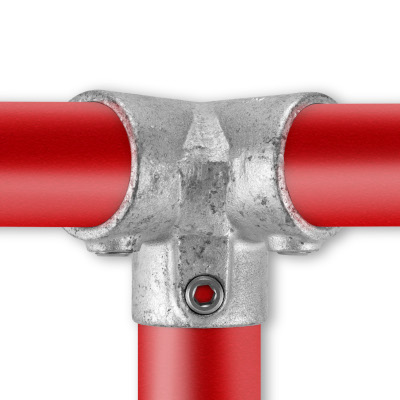
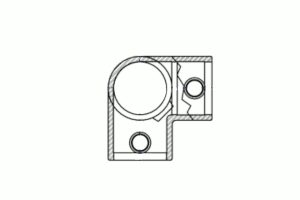
Take a length of tube at 3m and place a 2 way 90 degree elbow (125) at the bottom of it ensuring the fitting is facing away from you. Using the hex key provided, tighten the grub screw on the fitting to the tube so it remains attached. Then take a 3 way 90 degree elbow (128) and secure it to the top of the tube, again ensuring the fitting is facing away from you but also inwards. Repeat this process with one more length of tube so you have two identical tubes. Place the next 3m tube into both 3 way 90 degree elbows and tighten the grubscrews. This has now formed the front of your Golf Net Cage.
Step 2
Take a length of tube at 3m and place a 3 way 90 degree elbow (128) at the bottom of it ensuring the fitting is facing towards you and towards the middle of the frame. Take another 3 way 90 degree elbow (128) and secure it to the top of the tube, again ensuring the fitting is facing towards you but also inwards. Repeat this process with one more length of tube so you have two identical tubes. Place a 3m tube into the top two 3 way 90 degree elbows and tighten the grubscrews and repeat this process at the bottom. This has now formed the rear of your Golf Net Cage.


Step 3
We recommend for step 3 having someone assist you
Stand the front and rear panels upright and place a length of tube inside the 2 way 90 degree elbow (125) at the bottom of the front panel on the golf cage and connect the other end to the 3 way 90 degree elbow (128) on the rear panel. Tighten the grubscrews and repeat at the other side. Take your step ladders and place the remaining tubes into the 3 way 90 degree elbows (128) at the top of the cage and tighten the grubscrews. Your cage is now complete and ready to install then net.