


Build Your Own Picnic Table & Bench
What you will need...
- Hex key supplied
- Electric Screwdriver
Product Summary
Made from galvanised tube and tube clamp parts and scaffold boards. The kits come complete with all the components for you to make one picnic table or one picnic table and two benches. The scaffold boards are made from responsibly sourced and FSC approved whiteboard timber and compliant to BS2482. They are also fire retardant treated to Euroclass B or C.
The table is 1500mm long, 670mm deep and 760mm high and each bench is 1200mm long, 220mm deep and 500mm high.
The table frame also has the option for you to site a parasol (not supplied) if you wish. You can pass the parasol through the tube clamp component on the middle frame of the table into a suitable base. However, please note that the scaffold boards that form the table top are NOT supplied with a predrilled hole for a parasol. Please see the diagram on the link shown below.
Please note that the below image shows one bench but the table and bench kit comes supplied with TWO benches.

Parts
Step by Step Guide - Picnic Table

Step 1
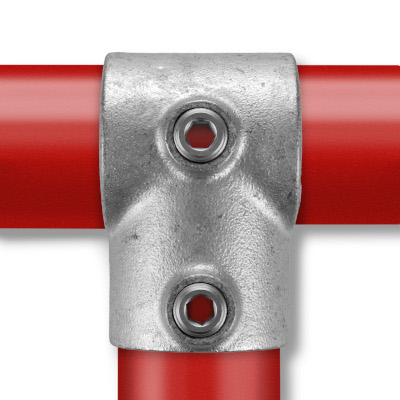
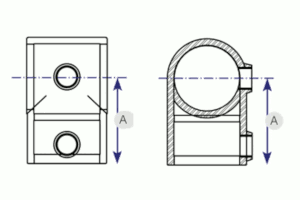
Take the Wall Plate (131) and slide a 670mm length of galvanised tube into the fitting until it hits the bottom. Using the hex key, tighten the grub screws on the fitting to the tube so it remains attached. Next slide the middle fitting (101) down the tube to the required position (about a third of the way down the tube) and tighten the grub screw. Finally fit the top fitting (131) ensuring all fittings are aligned. You can then tighten the grub screws and your first leg is complete. Repeat this process 3 more times to create all 4 legs.
Step 2
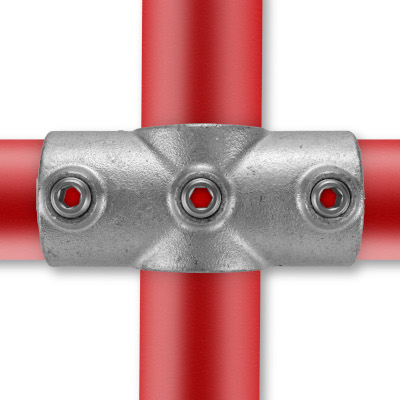
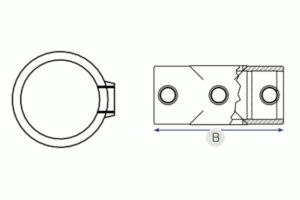
Take a length of galvanised tube 460mm long and slide a Short Tee (101) to the middle of the tube and tighten the grub screw. Place each side of the 460mm length into the Short Tee (101) which is attached to your table legs and tighten the grub screws. This should now create a H shape with the legs. Repeat this action again on the other 2 legs. To join all the legs together, place the 2 lengths of 600m tube into the remaining Short Tee’s on the H shape and join the frame together with the 2 Socket Cross (119) and tighten all the grub screws to ensure the frame is tightly secured. The frame is now ready for the scaffold board table top.


Step 3
Lay the 3 1500mm scaffold boards side by side ensuring they are level. Take the 600mm lengths of scaffold board and place them at each end ensuring they cover the 3 boards. Take 6 screws and secure the 600mm boards to the 1500mm boards (2 screws for each board) This will complete your table top. Place your frame on top of the 600mm boards ensuring the frame is equally spaced at all sides and secure the frame to the boards using the screws provided. Once secured flip the table over and your Picnic Table Kit is complete.
Step by Step Guide - Picnic Bench

Step 1
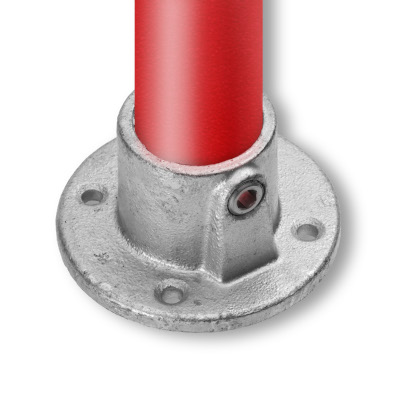
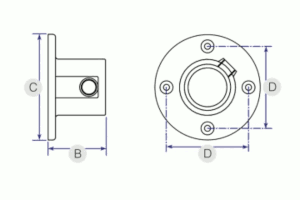
Take the Wall Plate (131) and slide a 450mm length of galvanised tube into the fitting until it hits the bottom. Using the hex key, tighten the grub screws on the fitting to the tube so it remains attached. Next slide the middle fitting (101) down the tube to the required position (About halfway down the tube) and tighten the grub screw. Finally fit the top fitting (131) ensuring all fittings are aligned. You can then tighten the grub screws and your first leg is complete. Repeat this process 3 more times to create all 4 legs.
Step 2
Take a length of galvanised tube 100mm long and slide a Short Tee (101) to the middle of the tube and tighten the grub screw. Place each side of the 100mm length into the Short Tee (101) which is attached to your bench legs and tighten the grub screws. This should now create a H shape with the legs. Repeat this action again on the other 2 legs. To join all the legs together, place the 885mm length of tube into the remaining Short Tee’s on the H shape and join the frame together. Tighten all the grub screws to ensure the frame is tightly secured. The frame is now ready for the scaffold board bench top.


Step 3
Lay the 1200mm scaffold board on the floor and place the frame on top of it ensuring the frame is equally spaced at all sides and secure the frame to the board using the screws provided. Once secured flip the bench over and your Picnic Table Bench Kit is complete. Repeat each step again to complete your other bench.