


Build Your Own Tube & Clamp Shelving Unit
What you will need...
- Hex key supplied
- Drill with 7mm masonry drill bit.
- Wall fixings (Brown Plugs and 2" Screws)
- Hammer
- Spirit Level
- Tape Measure
Product Summary
Fixed option shelving units which have the flexibility to be extended, supplied with all the parts for you to assemble on site.
Available in 4 lengths; 1m, 1.5m, 2m and 3m and 2 heights; 1.8m and 2.1m. The units are approximately 225mm deep.
Made from 33.7mm galvanised tube and tube clamp parts to give a modern ‘industrial’ feel, each unit comes supplied with the galvanised tube, tube clamp parts and scaffold boards for 4 shelves (scaffold board metal end bands are not included). The 3m wide version includes one middle and two end supports and the 1m and 1.5m versions have two end supports only.
The scaffold boards supplied are made from responsibly sourced and FSC approved whiteboard timber and are compliant to BS2482. They are also fire retardant treated to Euroclass B or C and are 225mm wide and 38mm thick.*
Need more shelves? Not a problem. All you need to do is purchase additional scaffold boards and brackets for the number of shelves you wish to add.
The shelving units are supplied in a ‘silver’ galvanised finish but can also be powder coated in a RAL colour of your choice for an extra cost, which we will be happy to quote you for. Please email us with your requirements on sales@themetalstore.co.uk
Parts
*Important: Please note that the scaffold boards we use are approximately 3m in length but can vary by +/-5mm.
Step by Step Guide

Step 1
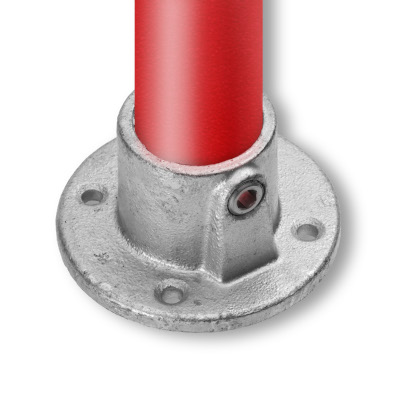
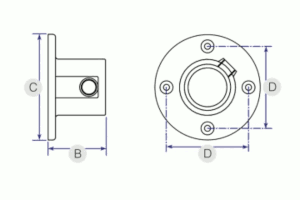
- Take a Wall Plate (131) and slide one of the long vertical lengths of galvanised tube into the fitting until it hits the bottom.
- Using the hex key, tighten the grub screw on the fitting to the tube so it remains attached.
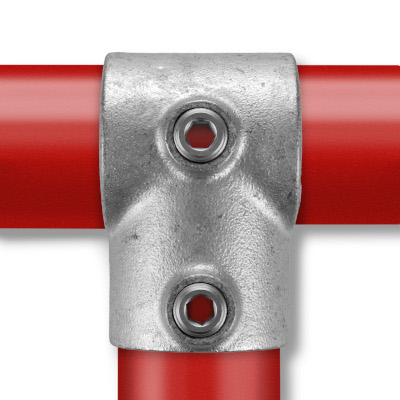
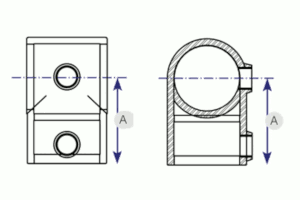
- Next slide the 3 Short Tee’s (101) down the tube to the required positions (usually equally spaced along the upright) and tighten the grub screws.
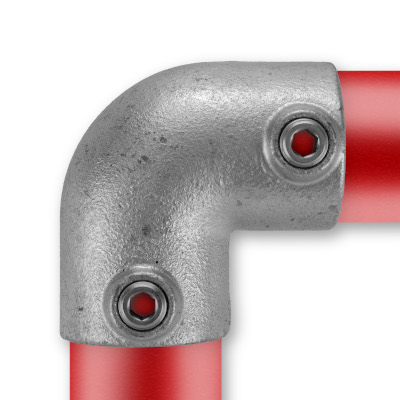
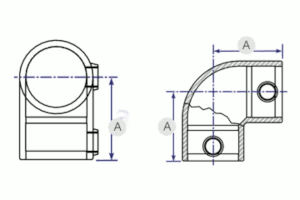
- Finally fit the 90 Degree 2 Way Elbow (125) to the top of the tube ensuring all fittings are aligned. You can then tighten the grub screws and your first upright post is complete.
- Repeat this process to add the other upright sections.
Step 2
- Take another Wall Plate (131) and slide one of the short lengths of galvanised tube into the fitting until it hits the bottom.
- Using the hex key, tighten the grub screw on the fitting to the tube so it remains attached.
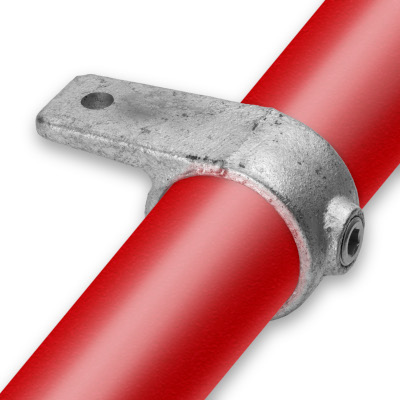
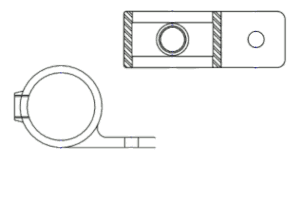
- Next slide the Single Lugged Bracket (199) to the middle of the tube ensuring the fitting faces inwards and tighten.
- This can then be placed into one of the clamps positioned on the upright described in step 1.
- This process needs to be followed until all 8 fittings on the uprights are filled.
Please Note: If you have purchased a 2m or 3m Shelving Unit you will have received 3 uprights and 4 Double Lugged Brackets (198) which is to be used as the middle upright.


Step 3
- Place your upright post into position against the wall ensuring the fittings are flush to the wall.
- Take a spirit level and place onto the side of the upright to ensure it is level. If placing onto brickwork mark 16 holes to show where it needs to be drilled.
- Remove the upright and drill the holes.
- Place the upright post over the holes and fix to the wall through the Wall Plate and ensure the upright is tightly secured.
- Once secured, repeat on the other upright(s).
- Finally, place your scaffold boards onto the secured uprights and secure them in place through the Lugged Brackets.