


Build Your Own Tube Clamp Climbing Frame
What you will need...
- Hex key supplied
Product Summary
Your galvanised tube and tube clamp climbing frame kit is supplied with all the parts you need to assemble on site. The frame is approximately 2.2m high, 3m long and 700mm wide. The end steps and middle horizontal rails can be fixed at a height to suit your project.
The main frame and monkey bars are made from strong 33.7mm galvanised tube and tube clamp parts.
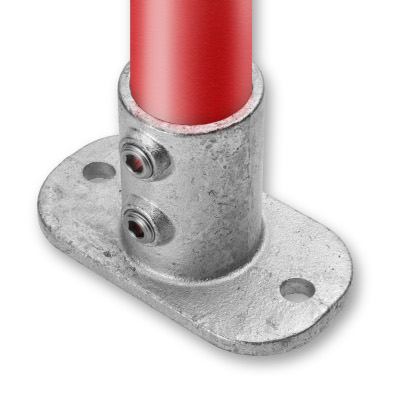
If you are fixing the frame onto solid ground you will need to purchase the Tube Clamp Climbing Frame Kit (With Base Plates) These are supplied in a set of 6, one for each vertical post. You may also require bolts, two per plate, which can also be purchased from The Metal Store.
Important: If you have purchased the Tube Clamp Climbing Frame Kit (Ground Sunk) you will need to fix the frame directly into the ground and sink the vertical posts in a minimum of 300mm.
Please note that installation, suitability and stability of the frame (prior to and during any use) is entirely at the customers own risk and it is the customers responsibility to ensure that they are satisfied that the frame is suitable for the ages of the children who will be using it and it is sited safely within the intended area away from any possible dangers, e.g. fences or garden accessories. The Metal Store will not accept any liability whatsoever for any damage/injury caused by the installation and use of this product including without limitation, indirect or consequential loss or damage, or any loss or damage.

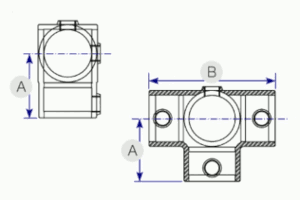
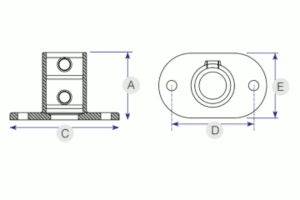
Parts
Step by Step Guide

Step 1
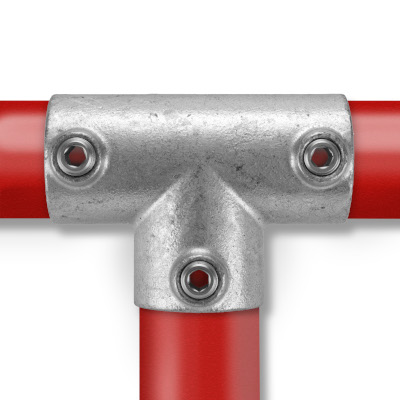
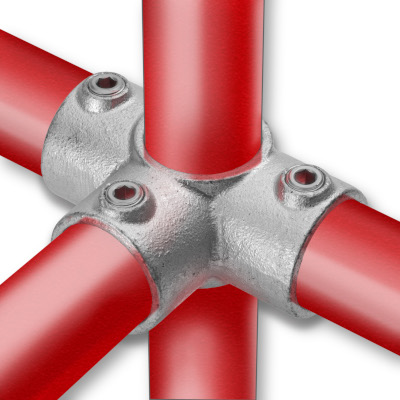
Lay 4 1500mm tubes down parallel (roughly 700mm apart) and join together using a 3-way Outlet Tee (176) ensuring the bottom of the fitting is facing upwards. Take the Allen Key supplied and tighten the grubscrews. Evenly space out 6 Short Tees’s (101) along each parallel tube ensuring the smaller end of the fitting is facing inwards towards the other tube and tighten the grubscrews.
Step 2
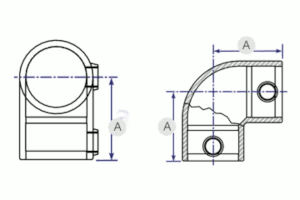
Take 4 90 Degree 2 Way Elbows and place at the end of each tube. Tighten the grubscrews so they are fixed tight to the tube. Take 7 lengths at 700mm and insert them inside the Short Tee’s (101) and 3-way Outlet Tee’s (176) and tighten the grubscrews.


Step 3
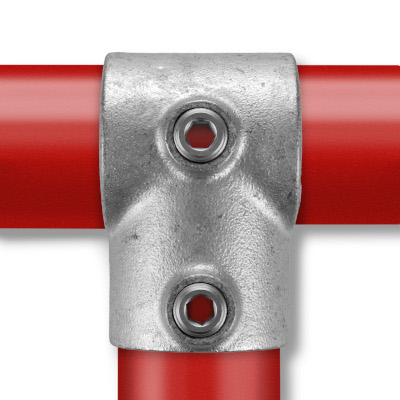
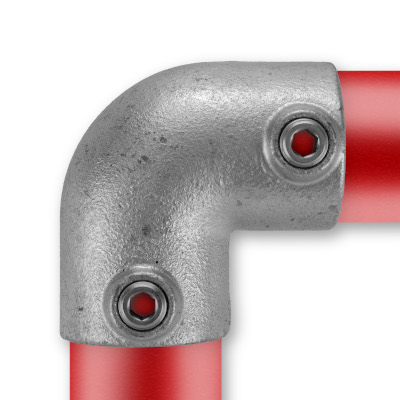
Take 4 vertical tubes (2500mm or 2200mm) and place into the 90 degree 2 Way Elbows (125) and tighten the grubscrews. Take the 2 remaining vertical tubes (2534mm or 2234mm) and place into the 3 Way Outlet Tee’s (176) and tighten the grubscrews. Push the frame onto its side and slide a Long Tee (104) down each of the middle verticals and leave loose. Slide 3 Long Tee’s (104) down each of the verticals on your right hand side and 2 Long Tee’s (104) down each vertical on the left hand side and leave loose.
Step 4
Take the 2 remaining lengths of tube at 1500mm and place between the middle verticals and the right hand verticals, ensuring the tube enters the Long Tee (104) in the middle. These can then be tightened anywhere up the frame to add stability or for use in another activity. Place the 4 remaining lengths at 700mm and place inside the remaining Long Tee’s (104) and position along the frame to create your steps up to the bars and fasten the grubscrews.


Step 5
If you have purchased the Tube Clamp Climbing Frame Kit (With Base Plates) you can now attach these to the bottom of each vertical and fix to the ground. If you have purchased the Tube Clamp Climbing Frame Kit (Ground Sunk) you will need to dig 6 holes 300mm deep, place the frame inside them and fill with concreate to ensure the frame is stable.
Step 6
Finally go around the frame again and ensure all grubscrews are securely fastened to the tubes. You now have a completed Tube Clamp Climbing Frame.